Tag Archives: clay

Shamans and Fairies, Oh My! (an update on our Scarborough Costumes)

2 Apr

So, we picked up our tickets for Scarborough Ren Fest last weekend, and we’re planning on making it to opening day (for the first time!) this weekend. I’ve been working hard on finishing our costumes, and, fortunately, my mom agreed to make Tom’s peasant pants, so I could concentrate on the other stuff.

Now, they’re not your typical renaissance festival costumes, exactly. Tom is going as a shaman/green man combo, and I’m going as a dragon fairy. There are nods to renaissance attire, but they’re in no way meant to be historically accurate.

I finished Tom’s “breastplate” (for lack of a better word.) It went from this:

006

… to this:

011

I embroidered Nordic designs onto a pleather-y fabric (it’s felted on the back, which I hope will be comfortable for him to wear all day.) There are runic compasses, symbols for guiding you to a specific outcome or trait, and a border design I found online. I’ve hand sewn on faux fur trim, and leather fringe and trim, and added moss and acrylic paint for a lived-in look.

I also made antlers/horns from Sculpey clay to add to his headdress. I painted the antlers with various colors of acrylic paint, and sealed with Mod Podge. Then, I attached them to their own cord to be worn underneath the band of the headdress, which I cut holes into for the antlers to “grow” out of.

014

I tried out some makeup looks for my dragon fairy costume yesterday:

010

I plan on dyeing my hair purple before Saturday, hence the purple eyebrows. I still need some practice with using fishnets to produce a “scale” effect on my skin, but I like the way the colors coordinate with the headdress.

To view more photos of our costume pieces, go to this post. You’ll find more of my fairy costume, and some other in progress and inspiration pics!

Gentle hugs,

Chelsea

More Halloween Crafty-ness

5 Aug

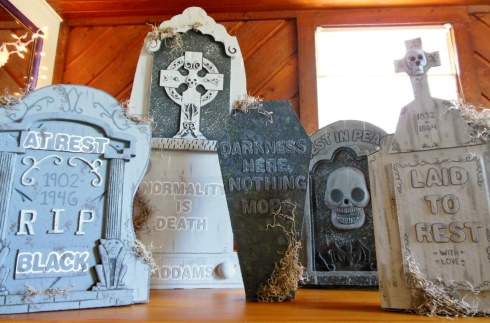
I’m really on a creativity roll, guys! I finished my cardboard/styrofoam tombstones:

014

I think they’re a nice mixture of creepy and whimsical. I’m going for a bizarre, Addams Family inspired look this year.

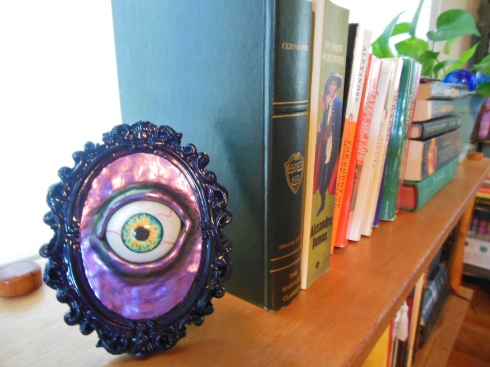
I also tried a technique I found months ago, using a ping pong ball as the base for an eyeball. The “veins” are red embroidery thread, the iris/pupil is decoupaged onto the ball, which I cut in half, and surrounded with Sculpey III clay. I left an opening for the eye, sculpted around it inside the frame, took the eye out, and baked the clay for about 30 minutes. (That was really too long. 15-20 would have been fine.) Then I cut the edges to help the clay fit perfectly in the frame, popped the eyeball back inside the opening, and coated with one of my favorite iridescent nail polish colors. FYI: I found the cute frame at Michaels, in the “dollar” bins for $2.

014


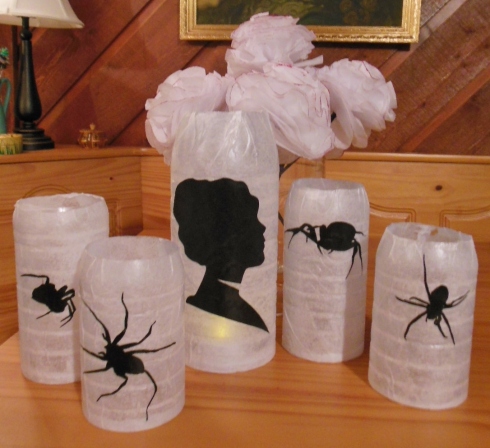
Lastly, save any water bottles you use! When we buy bottled water (which isn’t often,) we tend to reuse the bottles, anyway, so I thought I’d make something pretty from them. This is a super simple project. Cut the top and bottom off of your bottle with a razor, making it whatever height you like. Use Mod Podge to decoupage a sheet of tissue paper onto your bottle, then add silhouette printouts on top. I strongly suggest using battery operated lights inside to avoid any danger of melting the plastic!

001


Do you see that my cameo lady (Marie Antoinette) has been beheaded? I cut a triangle from the silhouette; I like the subtlety of it.

So, I’ve been very productive these past few weeks! Still haven’t decided if we should have a Halloween party or not … maybe I can get my Etsy Fort Worth pals + friends/family together for a Halloween craft party. How are you preparing for fall?

Gentle hugs,

Chels


“Do not meddle in the affairs of dragons, for you are crunchy and good with ketchup.”

10 Mar

Ah, finally, the claws (and horns) come out:

001 004 009


It’s taken me a while to update, since we’ve had lots of new projects here at the mission, and my poor mom had oral surgery that resulted in what we’re confident is a fractured jaw. (She’s had her jaw broken before – I trust her judgement.) We’re also in the process of looking for a new place to live, and I’ve been organizing my craft room in hopes that it will make the moving process easier when the time comes. (I’ll post pictures once I’ve finished!)

So, I’ve been slowly but surely working on my dragon fairy costume for the upcoming Renaissance Festival, and I finally got around to making these guys a few weeks ago. I bought black Fimo clay and went to town, rolling and shaping. I used aluminum foil to create a light base for the horns, so that they would weigh less and take less time in the oven. I poked holes with toothpicks so that I can attach them to clips to place in my hair, and gave them a couple of good coats of black glitter paint. (You could mix white glue with glitter to achieve the same effect.) The talons took much less time and effort to make, and I wrapped them with wire to coordinate with the jewelry I made for the costume:

011


Next up, I get to try my hand at making my first corset! Believe it or not, you don’t see many dragons at the ren fair. It’s probably because most dragon costumes are either large, plushy theme park suits, or the super skimpy versions made for women that you can buy from the party store. I think my version is coming along pretty nicely. Fortunately, I don’t have to worry about historical accuracy; the patrons of the fair are forgiving when it comes to costumes, especially of the fantasy variety.

Gentle hugs,

Chels